
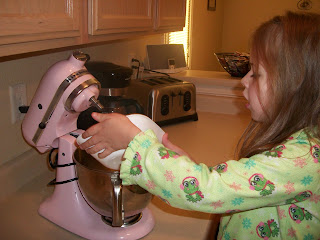
Muffins were requested for breakfast last weekend so I threw these together with what I had on hand. I used the basic sweet muffin recipe from my SMS book as the base and added chopped frozen cherries and a handful of white chocolate chips. These muffins were fantastic! Great flavor and they were gone quickly.
Enjoy!
White Chocolate Cherry Muffins
Adapted from The Sweet Melissa Baking Book
2 3/4 cup flour
1 TBSP plus 1 tsp baking powder
1/2 cup sugar
1/2 tsp salt
8 TBSP butter, melted
1/3 cup packed brown sugar
2 eggs
1/4 cup heavy cream
1/2 cup milk
1 cup chopped cherries
1/4 cup white chocolate chips
Preheat oven to 350.
Mix flour through salt. Toss cherries and chips into flour mixture. Set aside.
Whisk butter, brown sugar, and eggs. Add milk and cream.
Mix wet into dry.
Divide into muffin cups. Bake for 30-35 minutes or until toothpick comes out clean.
Thursday, April 29, 2010
White Chocolate Cherry Muffins
Wednesday, April 28, 2010
Chicken Ranch Mac & Cheese
 This mac and cheese is so good that I made it twice in one week. First, and I served it as a dinner and followed the recipe exactly as written. I loved the chunks of chicken and the wonderful flavor the dill gave it.
The second time I made it, I served it as a lunch and deviated from the recipe a bit. I omitted the chicken, doubled the bacon (and mixed it in with the noodles instead of using it as a topping), and used sour cream instead of cream of mushroom soup.
It tasted great both ways and I will definately be making this again. The sour cream and cream of mushroom soup can be used interchangeably without much difference. so that comes in handy in case you only have sour cream on hand!
Enjoy!
Bacon, Ranch, and Chicken Mac & Cheese
Cooking Light March 2010
8 oz uncooked elbow macaroni
1 slice bacon
8 oz boneless, skinless chicken, cut into 1" pieces
1 TBSP butter
1 TBSP flour
1 1/2 cups milk
1/3 cup cream of mushroom soup (or 1/3 cup sour cream)
3/4 cup shredded Italian blend cheese
1/2 tsp onion powder
1/2 tsp garlic powder
1/2 tsp dill
1/2 tsp salt
1/2 cup colby jack or cheddar cheese
Cook noodles; drain and set aside.
Cook bacon until crisp. Crumble and set aside.
Add chicken to bacon drippings and cook until done.
Melt butter in large saucepan; sprinkle flour over it. Cook 2 minutes, whisking constantly. Combine milk and soup; gradually add to butter/flour.
Bring to a boil and continue whisking until thick, about 2 minutes.
Add cheese and stir until melted. Mix in chicken, noodles, and spices.
Preheat broiler. Put mixture in 8"pan. Sprinkle with colby and broil until cheese melts.
Tuesday, April 27, 2010
Daring Bakers: Traditional British Pudding

Suet is the raw fat from a cow or sheep that is found around the kidneys. We were encouraged to use suet, but in the case of unavailability, we were allowed to use shortening or butter. We were also given a lot of options regarding what type of pudding we would make; sweet or savory.
A British pudding is not the type of pudding that Americans think of. Pudding refers to the type of dish that it is cooked in and the cooking method. A pudding dish is basically a big bowl and the puddings are steamed, not baked.

I opted to make a chocolate pudding and I used butter for it. I could not find suet, so butter was the option I went with. The chocolate pudding, while not beautiful, was incredibly delicious. It was a gooey, chocolatey brownie/cake. So good!

This was the first time I have steamed a dessert and it turned out so moist. The benefit of steaming comes from having the steam completely surround the dish therefore creating a more moist pudding. Plus, overcooking is difficult to do while steaming these puddings.

After being flipped out of the pudding bowl.
Very Chocolate Pudding
The Pudding Club
120g Unsalted Butter
120g Caster Sugar
120g Self-rising flour
30g Cocoa Powder
2 Eggs
60g Chocolate Chips
Cream the butter and sugar together until light and fluffy. Sift the flour and cocoa together and add with the egg, a little at a time, to the creamed mixture, beating well between each addition. Finally, stir in half the chocolate chips.
Monday, April 26, 2010
Almond Lovers Chocolate Chip Cookies

I saw the recipe on Jenny's blog, Picky Palate (visit her blog... you won't be disappointed!). I am not a big nut fan in my cookies but I was intrigued by the addition of the almond paste because it would give that nutty flavor without having actual nuts.
Almond Lovers Chocolate Chip Cookies
Recipe from Picky Palate
2 sticks softened butter
3/4 Cup granulated sugar
3/4 Cup brown sugar
3 oz Odense Pure Almond Paste (I used 6 oz for my cookies)
2 eggs
1 Tablespoon vanilla
2 1/2 Cups all purpose flour
1 teaspoon baking soda
1/2 teaspoon salt
12 oz bag chocolate chips
1. Preheat oven to 350 degrees F. In a stand or electric mixer, beat the butter and sugars until well combined, light and fluffy. Add the almond paste in pieces until well combined. Add in eggs and vanilla until well combined.
2. In a large bowl combine the flour, baking soda and salt. Slowly add to wet ingredients along with the chocolate chips. Mix until just combined. Scoop onto a silpat or parchment lined baking sheet with a medium cookie scoop. Bake for 10-12 minutes or until just golden crisp on the outside. Let cool on baking sheet for 5 minutes before transferring to a cooling rack.
Friday, April 23, 2010
CIA Homeschool: Bagels
 At least 4 or 5 years ago, Nathan printed out a bagel recipe for me and said I should try my hand at making bagels. For 4 or 5 years, the recipe went untouched. It's not that they were daunting... I actually like working with yeast. I can't quite pinpoint why I never made them, but I am sure regretting waiting so long now!

While going through my CIA book and picking out the recipes that I would be making for this challenge, I knew bagels would be among them. It was really about time that I made them!
Believe it or not, the toughest part of making the bagel is shaping them and even that isn't hard. I think the difficult part is gauging what size hole to put in the middle of the bagel. As you can see from my bagels, the hole isn't there too much.
The bagel starts with only 5 ingredients; flour, yeast, salt, water, and malt syrup. After a good kneading by my stand mixer, the dough needed to rest for 10 minutes before shaping. After the shaping, the bagels are then refrigerated for 8 hours (or overnight). This overnight refrigeration allows for you to have fresh bagels first thing in the morning (not to mention the real reason, which is to develop the flavor further and allow for the gluten to rest).
After resting, the bagels have a quick dip in boiling malt syrup/water and are then baked for 10-15 minutes.
Yeast Raised Breads and Rolls
Boule (White Wheat Lean Dough)
Split Loaf (Lean Dough with Pate Fermente)
Batard (Whole Wheat Lean Dough)
Baguette (Lean Dough with Poolish)
Grissini
Ciabatta
Stollen
Pannetone
Brioche a Tete
Craquelin
Challah (6 Braid)
Pita Bread
Apple Fritters
Berliners (Jelly Doughnuts)
Yeast Raised Doughnuts
Yeast Doughs (Not listed above)
Prosciutto and Provolone Dough
Tomato Dough
Roasted Potato Dough
Apple and Walnut Sourdough
Quick Breads and Cakes
Ginger Cake
Buttermilk Biscuits
Lemon Buttermilk Cake
Polenta Cake
Devil’s Food Cake
Chocolate XS
Carrot Cake
Roulade
Chocolate Souffle Cake
Patterned Jaconde Sponge
Walnut Cheesecake
Cookies
Mudslide Cookies
Sand Cookies
Orange Coconut Macaroons
Fudge Brownies
Pecan Diamonds (Short Dough)
Mirror Cookies (1-2-3 Cookie Dough)
Citrus Crisps
Zedern Brot
Vanilla Kipferl
Checkerboard Cookies
Madeleines
Springerle
Vanilla Pretzels
Ladyfingers
Langues-de-Chat Sandwiches
Frangipane Cake (Made into Petit Fours)
Custards, Creams, Mousses, and Souffles
Crème Brulee
Pots de Crème
Vanilla Pudding
Lemon Curd
Chocolate Mousse
Bavarian Cream
Raspberry Souffle
Frozen Desserts
Chocolate Swirl Ice Cream
Lemon Frozen Yogurt
Orange Sorbet
Vanilla Bean Sherbet
Fresh Ginger Granita
Praline Parfait
Frozen Lemon Savarin
Pies, Tarts, and Fruit Desserts
Blueberry Pie
Warm Apple Charlottes
Lemon Fantasy Tart
Zesty Lime Tart
Cheese Tart
Clafoutis
Cranberry Pecan Tart
Apple Strudel
Filled and Assembled Cakes and Tortes
Bavarian Cream Torte
Charlotte Russe
Opera Torte
Orange Mousseline Torte
Individual Pastries
Lemon Curd Tartlets
Pecan Cranberry Tartlets
Strip Tartlets
Pecan Passions
Classic Napoleons
Chocolate Peanut Butter Bombes
White and Dark Chocolate Mousse in Glasses
Trifles
Chocolate Eclairs
Bear Claws
Plated Desserts
Blueberry and Cream Cheese Crepes
Brown Sugar Roasted Pear
Funnel Cake with Maple Syrup and Summer Fruit Sauces
Chocolates and Confections
Milk Chocolate Truffles
Fujiyamas
Rochers
Candied Orange Peel
Soft Caramels
Hard Candies
Fudge
Nuss Bonbon
Marshmallows
FINAL PROJECT
TBD (Trying to pick a cake with gumpaste, modeling chocolate, and possibly pulled sugar)
Thursday, April 22, 2010
Guest Blogger: BacoGorgo Potato Salad
 This post comes courtesy of my friend, Kristl. Man, that potato salad looks amazing! You'll have to read through the recipe. It will give you a good laugh. Kristl really has a way with words! Thanks, Kris, for the great recipe!
-----------------------------------------------------------------------------
BacoGorgo Potato Salad
4 lbs. red potatoes, skin on, washed, and cut into bite-sized pieces
8 hard boiled eggs, shelled and cut into bite-sized pieces
10 pieces of turkey bacon
10 oz. crumbled Gorgonzola
1 1/2 c. light mayonnaise
1/2 c. yellow mustard
the zest of 2 lemons
5 tblsp. fresh minced parsley
Freshly ground mixed pepper to taste
Sea salt to taste (but careful, that Gorgonzola packs a punch)
Instructions:
Preheat oven to 375°.
Bring a stock pot of salted water to a boil and add potatoes. Cook potatoes until tender, but not too soft (about 15 minutes).
While potatoes reach their supreme level of being, bake turkey bacon in a single layer on a parchment covered (or you’ll be sorry) baking sheet for at least 10 minutes. You might even forget about it, as I did. This is fine, it turns out. When you think the turkey bacon is ready, it’s not. If you want the turkey bacon to pass as real bacon, you must let it get very, very (very) crispy until it’s brownish black. Okay, black. Once you’ve reached the point where you think you might have to run to Safeway to get more turkey bacon, remove the baking sheets and let the turkey bacon cool. Pat dry with a paper towel and bask in the glory of the magic you just performed by being just a little patient and not fearing your smoke alarm. Set aside. You have other stuff to do.
Once the potatoes are ready (you’ll notice the timelines will crash right into each other), remove from heat and drain immediately. Run cold water over the potatoes and drain some more. Do it again if it feels right.
Next, you’ll want to dump those potatoes into a couple of large mixing bowls so that you have ample room for mixing. (It turns out I have severe portion control issues when cooking and not one mixing bowl that could handle this on its own.) Moderately salt and pepper to your heart’s content.
Add light mayo, mustard, eggs, Gorgonzola, parsley, and lemon zest. Take those crisp little bacons and break off small bits into the bowl ruthlessly with your bare hands. I found this very fun. My wedding and engagement ring did not.
Toss until well-combined and then refrigerate so it tastes really good. Or, if you’re me and you’ve been working on this since you got home, eat some and then clean up afterward.
Prep & cooking time: I don’t know… what time is it?…
Servings: A million
*Maybe make before taking to a potluck? Memorial Day, Flag Day, Independence Day, and various other summer bbqs are coming up…
Hot Mama Tip: Add a couple shakes of Tabasco to this dish if you really want it to rock your world.
Wednesday, April 21, 2010
Cristine's Brownies aka Nathan's Ideal Brownies
 If I had to pick Nathan's favorite dessert, it would probably be brownies. Or at least that is the dessert that I have worked the hardest to make perfect for him. :) His ideal brownie has the crackley (that's so not a word, but it looks crackled!) top and is super fudgy on the inside.
This recipe came about after combining many brownie recipes and tweaking it a few times. I did this about 3 years ago and Nathan told me last week that he was surprised I haven't blogged these. I was pretty surprised, too!
These brownies are insanely chocolatey and oh so delicious. Nathan prefers to refrigerate them because then they turn even more fudge-like. Either way you shake it, though, these are fantastic!
Enjoy!
Cristine's Brownies
4 eggs
1 1/2 cups sugar
1/2 cup brown sugar
2 oz unsweetened chocolate
1 cup butter
2 tsp vanilla extract
3/4 cup cocoa powder
3/4 cup flour
Dash of salt
Preheat oven to 300.
Melt butter and chocolate in double boiler; set aside.
Beat eggs and sugars until light and fluffy. Mix in butter/chocolate mixture and vanilla. Add flour, salt, and cocoa powder. Mix just until combined.
Pour batter into a greased 8" square pan. Bake for about 50 minutes or until toothpick comes out clean.
Tuesday, April 20, 2010
TWD: Sweet Cream Biscuits

Sweet Cream Biscuits. One word... YUM! It is always so nice to have something other than a dessert to make for TWD. Don't get me wrong, I love dessert! I wouldn't have joined TWD if I didn't considering the book is mostly desserts. But, whenever one of the non-dessert recipes is chosen, it is a welcomed break! (Although, I didn't pick a non-dessert for my May choice... let's not get crazy! heehee) These biscuits were a breeze to make and they baked up beautifully! An added bonus to the easy preparation is the fact that they are amazingly delicious! I loved them plain and with jam. Either way you shake it, these are fantastic!
Thanks to Melissa of Love at First Bite for hosting this week. The recipe (which you know you want!) can be found at her blog.
Monday, April 19, 2010
Chicken with Feta & Tomatoes and Avocado Salad
 I love feta. It is one of my favorite cheeses. I'll eat it plain, mixed in wraps, on top of salads. Pretty much any way you use it, I'll eat it!
A few nights ago I was really craving feta and this was a great meal that satisfied that craving. The chicken is a very basic baked chicken seasoned with oregano, salt, and pepper. You could also season it with a Greek seasoning blend if you had that on hand. Once the chicken is done, I topped it with sliced tomato and crumbled feta and returned it to the oven for a few minutes.
The avocado salad was absolutely delicious and just a mixture of what I had on hand. I sliced up a few avocados, tomatoes, and olives and mixed in some extra feta for good measure. Oh my wow.... so yummy!
Enjoy!
Chicken with Feta and Tomatoes
Chicken Breasts
Salt
Pepper
Oregano
Tomato Slices
Feta
Season chicken with salt, pepper, and oregano. Bake in 350 degree oven for 20-25 minutes or until done (internal temp 160). Top with tomato slices and feta. Return to oven until feta browns.
Avocado Salad
Avocado
Tomatoes
Olives
Feta
Mix ingredients and enjoy!
Sunday, April 18, 2010
SMS: Sweet Potato Cake with Cinnamon Rum Glaze
.JPG)
I was on the fence with this recipe. I don't eat sweet potatoes all that often, but Nathan loves them and asked if I could make this cake.
I made the cake as written, glaze and all. Usually I would omit the rum from the cake since I don't drink, but I was making this for Nathan and I thought he would enjoy the cake, glaze and all.
The cake itself was delicious. It was the glaze I had a problem with. The rum flavor was way to strong for me and I ended up just eating the inside of the cake. Nathan, on the other hand, really liked the cake. Considering he was the one I was making it for, I would call that a success.
Thanks to Lorelei of Mermaid Sweets for hosting this week. The recipe can be found at her blog.
Friday, April 16, 2010
Cookie Carnival: Coconut and Orange Icebox Cookies

Cookie Carnival has been through some changes lately. Kate of The Clean Plate Club had to step down as hostess of this group. Luckily, Tami of Tami's Kitchen Table Talk offered to take Kate's place and she took over the group.
This month's cookie was Coconut and Orange Icebox Cookies. I love coconut in any form and was excited to make this cookie.
The orange zest and coconut worked so well together. I really enjoyed these cookies. I did make a few changes, though.
First, I did not toast the coconut. Also, the cookies were supposed to be rolled in sugar and then half dipped in chocolate. I chose to sprinkle the tops with turbinado sugar and skip the chocolate all together. I know, I know. I was shocked, too, that I turned down adding chocolate! But, I loved these cookies just the way they were!
Coconut and Orange Icebox Cookies
2 cups all-purpose flour
2 tablespoons packed orange zest
1/2 teaspoon table salt
1 cup unsalted butter, at room temperature
1/2 cup granulated sugar, plus extra for rolling cookies
1/4 cup packed light brown sugar
1 large egg, at room temperature
1 teaspoon vanilla extract
1 cup toasted sweetened coconut
6 ounces semisweet chocolate, roughly chopped
Directions
Heat oven to 350 degrees F and arrange a rack in the middle.
Combine the flour, zest, and salt in a large bowl and whisk until evenly combined.
Using a stand mixer fitted with a paddle attachment beat together butter and sugars over high speed until light and airy, about 2 minutes. Add the sugars and beat until fluffy and the mixture looks like wet sand, about 2 more minutes. Add the egg and vanilla and mix until just combined.
Reduce the speed to medium and add the flour mixture and coconut and beat until just evenly combined. Lay 2 large pieces of plastic wrap on a clean work surface and put half of the dough along the center of each piece. Shape the dough into 2 logs measuring about 1 1/2-inches in diameter and 10-inches long. Roll logs up in the plastic and secure tightly. Refrigerate the logs for 1 hour or up to several weeks.
Cut the logs into 1/2-inch slices. Roll the cookies in sugar to coat and shake off excess. Arrange on a baking sheet, leaving 1/2-inch between the cookies. Bake until set and golden on the edges, about 15 to 18 minutes. Remove to cooling racks to cool completely.
When cookies are cool, melt the chocolate in a small pan over medium-low heat until smooth. Dip half of each cookie into the chocolate, scrape off excess, and set on a cooling rack. Refrigerate for at least 15 minutes to set up before serving.
Thursday, April 15, 2010
Fettuccine Alfredo with Bacon

One of Nathan's favorite meals is Fettuccine Alfredo. I usually make another recipe, but when I saw a fettuccine with bacon on A Blog About Food, I knew I would try it. It combines two of Nathan's favorite foods, so I knew he would be a happy man.
Most alfredo recipes call for heavy cream and butter which makes for a very delicious sauce. But with all that butter and cream, I don't make alfredo often. That is what makes this recipe even more awesome. It is from Cooking Light!
And in case you are worried that you will miss that heavy cream, let me ease your fears. This alfredo is absolutely delicious! Sure, I will make my old standby from time to time but this I am glad I have found this lighter version so that we can enjoy fettuccine alfredo more often!
Enjoy!
Fettuccine Alfredo with Bacon
9 oz fettuccine noodles
2 slices applewood smoked bacon, chopped
1 teaspoon minced garlic
1 teaspoon all purpose flour
1 cup milk
2/3 cup grated Parmesan cheese
1/2 teaspoon salt
2 teaspoons chopped fresh parsley
1/2 teaspoon freshly ground black pepper
Directions
1. Cook pasta according to package directions. Drain, reserving 1/4 cup of liquid.
2. While pasta cooks, cook bacon in a large nonstick skillet over medium-high heat 4 minutes, or until crisp, stirring occasionally. Remove bacon from pan, reserving drippings. Add garlic to drippings in pan; saute 1 minute, stirring constantly. Sprinkle flour over garlic; cook 30 seconds, stirring constantly. Gradually add milk, stirring constantly. Cook two minutes, or until bubbly and slightly thick, stirring constantly. Reduce heat to low. Gradually add cheese stirring until cheese melts. Stir in salt and reserved 1/4 cup cooking liquid. Add hot pasta to pan; toss well to combine. Sprinkle with bacon, parsley, and pepper.
Serves 4: One serving is 1 cup
Per Serving: 339cal, 11.7g fat, 17.3g prot, 38.4g carb, 2g fiber
Wednesday, April 14, 2010
Cooking with Anya: Alligator Cake

Here is another installment of "Cooking with Anya". As I have mentioned before, Anya LOVES The Princess and The Frog. In the movie, there is a jazz playing alligator named Louis. Anya wanted to make an alligator cake just like Louis.
She had a great time mixing the ingredients. She had decided she wanted a rainbow cake, so she mixed food coloring into the white cake batter. She even let her little brother help her!


Decorating was so much fun for her! She was so proud of her cake and I was proud of her! I see a future cake decorator!


Now for the reason you read these posts... In Anya's words........

I made this alligator cake all different colors on the inside and it had a lot of green frosting on it. I frosted it all by myself and I put a lot of candy on it. I put Whoppers on it because I love Whoppers. It looked like a real alligator. And it was very, very fun making it. I loved eating the head, too, and I loved the Whoppers for the eyes.
My brother decorated a cake, but he just ate it. It was just the right size and I very loved it. Everyone should read this and everyone should make it. It was fun and delicious. Make it. Just follow the recipe. This is my story. And this is the end, of course.

Alligator Cake
1 10" baked Bundt cake
3-4 cups frosting, dyed green
Candy, for decorating
Cut bundt cake into 3 equal pieces. Slice one piece in half at a 45 degree angle. Arrange cake on tray to create a curvy alligator body. Use one of the angled pieces for the tail. Slice the other angled piece into 4 feet.
Frost and decorate cake as desired.
Tuesday, April 13, 2010
TWD: Swedish Visiting Cake
 Remember the fantastic twisted coffee cake I blogged a little bit ago? I went on and on about a delicious almond butter cake that I loved from the German bakery. Of course, anything that remotely resembles it I have to try.
When Nancy from The Dogs Eat The Crumbs chose Swedish Visiting Cake for this week's TWD I was very excited. The picture in the book looks so similar to the almond cake I love. I knew that I would not be passing this week up!
A great plus for this recipe is that it is super simple to assemble and it uses basic ingredients. I believe Dorie said in the introduction to this recipe that it is said that you can make this cake as you see visitors coming down the road and it will be ready by the time they arrive. Okay, so it isn't that quick, but it is quite speedy!
Thanks to Nancy for hosting this week. Make sure to head over to her blog for the recipe.
Monday, April 12, 2010
Homemade Taco Seasoning

I am having trouble finding anything to write this morning. I don't know why, but here I sit, thinking and thinking about what to write. I have a ton of posts to get up and yet I can't find the words to say anything about the recipes.
I figured taco seasoning would be a great one to post on a day where I have nothing to say. :) I know a lot of people buy the packets from the store but this is so easy and you can bottle it up and keep it on hand. Plus, it's a good recipe to have even if you don't want to always make your own. This way, if you forget to buy a packet at the store, you can just make it yourself!
Have a great Monday!
Homemade Taco Seasoning
2 TBSP chili powder
5 tsp paprika
4 1/2 tsp cumin
3 tsp onion powder
2 1/2 tsp garlic powder
1/8 tsp cayenne pepper
Mix all ingredients together. Recipe makes 21 teaspoons. 7 teaspoons equals one storebought taco seasoning packet.
Friday, April 9, 2010
Banana Blueberry Muffins

Bananas. Blueberries. Muffins. All delicious by themselves but put them together and you have something even more delicious!
Enjoy!
Banana Blueberry Mufins
3 large bananas
3/4 cup sugar
1 egg, slightly beaten
1/3 cup applesauce
1 tsp baking soda
1 tsp baking powder
1/2 tsp salt
1 1/2 cups whole wheat flour
1 cup fresh or frozen blueberries
Mash bananas in bowl; add sugar, egg, and applesauce. Mix well.
Combine dry ingredients in seperate bowl. Toss blueberries with dry ingredients. Fold dry with wet.
Fill muffin tins and bake at 375 for 20 minutes.
Thursday, April 8, 2010
Chicken Parmesan
 I love this chicken parmesan recipe! It is so delicious and quite simple to make. Plus, it is from Cooking Light, so it is good for you! (Or at least better for you!)
You can dress it up by making your own spaghetti sauce or you can make it easier and use storebought. I have done it both ways and either way is yummy!
Enjoy!

Cooking Light Chicken Parmesan
4 (4 oz) chicken breast halves
1/2 cup seasoned breadcrumbs
1/4 cup grated Parmesan
1/2 tsp Italian seasoning
1/8 tsp black pepper
1/3 cup all purpose flour
2 large egg whites, lightly beaten
2 tsp olive oil
4 cups hot cooked spaghetti (about 8 oz uncooked)
3 cups marinara sauce
1 cup mozzarella
Flatten chicken to 1/4" thickness.
Combine breadcrumbs through pepper. Dredge chicken in flour, then egg whites, then breadcrumb mixture.
Heat oil in skillet. Add chicken and cook 5 minutes on each side or until cooked through.
Preheat broiler.
Place 1 cup spaghetti in each serving dish. Top with 1/2 cup sauce and then chicken. Spoon 1/4 cup sauce on top of chicken and sprinkle with 1/4 cup mozzarella.
Place in broiler until cheese is melted.
Wednesday, April 7, 2010
Cooking with Anya: Nutella Self-Frosting Cupcakes
 I can't believe how long it has been since I have posted a "Cooking with Anya". She is always in the kitchen helping me cook/bake, but I have been slacking in making time to have her do her own thing. But I do have this one and one more coming soon, so I am making up for it!
Anya loves Nutella just about as much as I do. She doesn't get to eat it that often (despite what the commercials try to make you believe, it is NOT a health food... hahahaha!) but when she does she is one happy girl! When I asked her what she wanted to make, she asked for Nutella cupcakes and I found these self-frosting ones. They were delicious and easy to make.
Now for what Anya has to say.......


Nutella Frosted Cupcakes
1 1/2 sticks (3/4 cup, 12 oz) butter, softened
3/4 cup granulated sugar
3 large eggs
1/2 tsp vanilla extract
1 3/4 cups sifted all purpose flour
1/4 tsp salt
2 tsp baking powder
Nutella, approx. 1/3 cup
Preheat oven to 325F. Line 12 muffin tins with paper liners or grease the cups with some butter. Alternatively, butter an 8-inch round cake pan.
Cream together butter and sugar until light, 2 minutes. Add in eggs one at a time, until fully incorporated. Don’t worry if the batter doesn’t look smooth. Add vanilla. Stir in flour, salt and baking powder until batter is uniform and no flour remains.
Fill each muffin cup about 3/4 full (or pour all the batter into the cake pan). The batter will be thick. Top each cake with a dollop (I used about 2 tsp per cupcake and about 1/3 cup dolloped in tablespoon measures for the cake round) of Nutella. Swirl Nutella in with a toothpick, making sure to fold a bit of batter up over the nutella.
Bake cupcakes for about 20 minutes and the round cake for 25-30.
Remove to a wire rack to cool completely.
Makes 12 cupcakes or 1 8-inch round cake.
Tuesday, April 6, 2010
TWD: Not So Mocha-Walnut Bundt Cake

With that being said, I really wanted to try this bundt cake. It sounded fantastic! The dark layer calls for espresso powder and 1/4 cup of coffee. I substituted 1/4 cup water and 1 TBSP cocoa powder. Mmmmm... a walnutty vanilla & chocolate swirled cake. Delicious!
Thanks to Erin of When in Doubt... Leave it at 350 for hosting this week. The recipe can be found at her blog.
Monday, April 5, 2010
Pineapple Upside Down French Toast

It starts with melting butter with brown sugar, mixing in crushed pineapple, and then spreading that into a 9x13 pan. The bread is then dipped in a milk/cream/pineapple juice mixture and placed on top of the pineapple. After baking until golden, you are left with a DELICOUS breakfast!
Sunday, April 4, 2010
SMS: Pecan Shortbread Cookies

Friday, April 2, 2010
Guest Blogger: Grilled Pork Chop with Pineapple Salsa
This recipe comes courtesy of my friend, Lauren, who is currently in culinary school. Thank you for sharing this recipe, Lauren!
I made this in College in one of my cooking classes last week and wanted to share it with Cristine and her bloggers. I love this dish, its amazing! Its a little time consuming, but extremely worth it. For the pineapple salsa a lot of fruit and veggies need to be chopped and it is really the only thing that consumes time. The tender Pork with the salsa is the most extraordinary taste you will ever have with meat. I hope everyone will enjoy it!
Grilled Pork Chop with Pineapple Salsa
Grilled Pork Chop:
1 pork chop
2 oz. oil
salt and pepper
1/4 tsp. Cumin
1/4 tsp.Coriander
1/4 tsp. Paprika
1/4 tsp. Cayenne
Pineapple Salsa:
1/4 Pineapple peeled
1/2 Papaya
1/2 Mango
1/2 Red Bell Pepper
1/2 Red Onion
1 Jalapeno
1 Lime
2-3 Sprigs Cilantro
2-3 cloves garlic
Directions:
First season the Pork Chop with salt and pepper, then put olive oil on both sides of the pork chop then season on both sides with the 4 spices. Grill on both sides until it reaches the temp of 135.
To make the pineapple salsa cut all fruits and vegetables in small dice form. Then mince garlic, and cilantro with juice of half of a lime and one tsp of olive oil.
Thursday, April 1, 2010
Blueberry Orange Bread
 I love quick breads! They are so delicious and so easy to make. This blueberry orange bread is absolutely fantastic and I can't wait to make it again!
I came across the recipe at Fake Ginger. I can't imagine that you haven't visted there, but if you haven't, get over to Fake Ginger now. Amanda has amazing recipes and amazing pictures. I end up bookmarking pretty much every single one of her recipes!
Happy April!
Blueberry Orange Bread
Recipe from Fake Ginger
2 cups all-purpose flour
1 cup sugar
1 teaspoon baking powder
1/2 teaspoon baking soda
1/2 teaspoon salt
1 egg
3/4 cup fresh orange juice
2 tablespoons butter, melted
1 tablespoon orange zest
3/4 cup blueberries, fresh or frozen
Preheat oven to 350. Grease a 9×5 inch loaf pan (or 2 mini ones).
In a large bowl, combine flour, sugar, baking powder, baking soda, and salt.
In a small bowl, combine egg, orange juice, melted butter, and orange zest. Add egg mixture to flour mixture. Stir until just combined. Fold in blueberries. Spoon into prepared loaf pan making sure the top is even. Bake for 65 to 70 minutes (50 to 55 for the mini ones) or until a toothpick inserted near the center comes out clean. Cool for 10 minutes in pan and then turn out onto a wire rack.


.jpg)


