I have 2 pumpkins worth of puree in my freezer so I will be making A LOT of pumpkin recipes over the next month. I'm pretty excited, though, because I love pumpkin and all things pumpkin. Actually, I usually just have sweet pumpkin things. The other night I had my first savory pumpkin dish - pumpkin soup. It was so delicious! So, I will be making it soon and I will post pics and the recipe (um.... Monica... can I get the recipe???).
Wow... kinda got off topic there! I am a big breakfast girl and love waffles. These pumpkin waffles were absolutely delicious and I added some nuts on top for some crunch. A perfect fall (or winter with the weather we've been having!) breakfast! Pumpkin Waffles
Recipe from Smitten Kitchen
2 1/2 cups all-purpose flour
1/3 cup packed light brown sugar
2 1/4 teaspoons baking powder
1 teaspoon baking soda
1/2 teaspoon salt
2 teaspoons ground cinnamon
1 teaspoon ground ginger
1/4 teaspoon ground cloves
4 large eggs, separated
2 cups well-shaken buttermilk
1 cup canned solid-pack pumpkin
3/4 stick (6 tablespoons) unsalted butter, melted
Vegetable oil for brushing waffle iron or cooking spray
Preheat oven to 250°F and preheat waffle iron.
Sift together flour, brown sugar, baking powder and soda, salt, and spices.
Whisk egg yolks in a large bowl with buttermilk, pumpkin, and butter until smooth. Whisk in dry ingredients just until smooth.
In a mixing bowl with a whisk attachment, whisk the egg whites until they hold soft peaks (as in, far soften than the over-beaten whites you’ll see in my picture above). Folk them gently into the waffle batter, until just combined.
Brush waffle iron lightly with oil and spoon batter (about 2 cups for four 4-inch Belgian waffles) into waffle iron, spreading quickly. Cook according to manufacturer’s instructions.
Transfer waffles to rack in oven to keep warm and crisp. Make more waffles in same manner.
Friday, October 31, 2008
Pumpkin Waffles
Nutella and Banana Empanadas & Nutella Chocolate Chip Cookies
Nutella week sadly has to come to an end. It has been fun trying all these great recipes and have no fear, Nutella will still be regularly making an appearance on this blog. I have 17 Nutella recipes in my "try" file and I just found a website with at least 40-50 Nutella recipes! So, needless to say, there will be a lot of Nutella baking in my future!


Daring Baker Past Challenge - Chocolate Crepe Cake
(NOTE: Final recipe for Nutella week will be up later today!)
There was a lot of screaming done at this cake by the Daring Bakers back in April and we were warned about it! Lis, one of the co-founders of DB, had this to say on the topic:
"Daring Baker Administration is NOT responsible for any loss of hair, batter splatters on kitchen walls, nervous tics you OR your dog may develop, money lost in falling for the old "you need a French crepe pan and nifty crap spatula" scam to make this cake, uncontrollable crying and swearing or any emotional damage your uncontrollable crying and/or swearing has on family members OR pets if you should try making the Crepe Cake. :) May the force be with you."
No complaining, right? We were warned! Despite the warning, I decided to give it a go!
On the day I decided to make the cake I just so happened to only have 1 stick of butter in the house. Seriously, I always have AT LEAST 1 pound of butter on hand at all times. Well... that meant I would just have to cut the recipe in half. No harm, no foul. Who needs an entire chocolate crepe cake anyway?

According to the challenge rules we had to follow the crepe recipe and the glaze recipe but the filling was up to us. I was going to make a vanilla pastry cream but the butter dilemma made that not possible. Oh well... It is Nutella week, right? So, take a jar of Nutella and use that as a filling! The original recipe calls for a hazelnut filling, so I am sort of on the same wavelength, no?
I didn't really have any challenges with this recipe. My biggest issue with it is that it is freakishly time consuming. Even though I cut the recipe in half I still ended up with 25 crepes. I don't know how that happened considering the original recipe makes 32 crepes.
Making 25 crepes takes a while. It seems like an eternity, especially when you have a tired and cranky 5 month old who just wants you to finish the darn crepes!
Anyway, once I finally got the crepes finished everything else was rather simple. I just layered the crepes with Nutella and poured the glaze on top. The glaze didn't set as smoothly as I would've liked and when I cut it the top slid a bit, but no big deal.

The cake tasted very good but I highly doubt I would make it again. Too much fuss for not much reward. I would much rather have a single crepe with Nutella and a banana or a chocolate cake with Nutella frosting. But, hey, I completed the challenge and that alone was worth it to me!
Wednesday, October 29, 2008
Heavenly Nutella Snack & Blog Awards
Before I get to the Nutella recipe of the day I wanted to pass out some blog awards! First, a big thank you to Pamela from Cookies with Boys for giving me the Premio Arte y Pico Award! You totally made my day! Also, I was given two other awards last week and have been slacking on passing those along, so I will pass out all three today!
 First, the Premio Arte y Pico Award comes with some rules. They are:
2. Advertise name of the author and also a link to his or her blog to be visited by everyone
3. Each award-winner, has to show the award and put the name and link to the blog that has given her or him the award itself.
4. Award-winner and the one who has given the prize has to show the link of “Arte y pico” blog, so everyone will know the origin of this award.
5. Share these rules.

The "E for Excellent" award is going to Nancy of The Dogs Eat the Crumbs, Linda of Tender Crumb, and Emily Rose of Sandmuffin!

And last but not least, the Kreativ Blogger Award goes to Pamela of Cookies with Boys and Leslie of The Hungry Housewife!
Now, for Heavenly Nutella Snacks. Seriously, that is what the name for this recipe is. Most people call this "Puppy Chow" or "White Trash" but this variation truly is heavenly! It didn't last long, either. It was gone by the end of the day! (It was a half batch and I wasn't the only one eating it... 2 others helped me out!)
 Heavenly Nutella Snacks
6 tablespoons unsalted butter
1 (13 ounce) jar chocolate hazelnut spread
6 ounces semi-sweet chocolate chips
1 (12 ounce) box corn and crispy rice cereal
2 1/2 cups powdered sugar
3/4 cup unsweetened cocoa
In a saucepan, melt the butter, chocolate-hazelnut spread, and chocolate chips over medium-low heat, stirring occasionally. Remove from the heat.
In a large bowl place the cereal and pour the melted chocolate mixture over the top. Gently stir well to coat evenly. Sprinkle with the powdered sugar and cocoa, and toss to coat.
Nutella and Peanut Butter Scones
It's no secret that I have fallen in love with scones. Now add Nutella to that and I'm in heaven! These scones were really good... just make sure to have a big glass of milk nearby! Mmmmm...
And now I need to go to the commissary and get more Nutella. This week has cleared my stash completely out!!!
Peanut Butter and Nutella Swirled Scones
Recipe from Baking Bites
1 cup all purpose flour
1 tsp baking powder
1/4 tsp salt
3 tbsp sugar
1/4 cup butter, chilled, cut into small pieces
5-6 tbsp light cream (half and half or milk is fine)
Peanut butter
Nutella
Preheat oven to 400F. Line a baking sheet with parchment paper.
In a medium or large bowl, whisk together flour, baking powder, salt and sugar. Add butter and toss to coat. Using your finger tips, rub the butter into the flour mixture until it resembles very coarse sand. A few large bits, about pea sized, are fine.
Add 5 tablespoons of cream and stir with a fork until dough comes together. If the mixture does not form a ball, add remaining tablespoon of cream.
Divide dough in 6 pieces and roll each into a ball. Gently flatten onto the baking sheet. Dip your fork in nutella and poke a shallow swirl into the top of 3 of the scones. Repeat with peanut butter and remaining scones. Most of the peanut butter and nutella should be on the surface of the scones, but using the fork to create some small holes will prevent anything from running off the scone.
Bake for 15 minutes, until scones are a light gold color.
Tuesday, October 28, 2008
Daring Bakers October Challenge - PIZZA!
*DISCLAIMER: LONG POST - TONS OF PICS!*
October is National Pizza Month and the Daring Bakers celebrated by making pizza! I was very excited for this challenge because of one of the stipulations - we must toss at least 2 of the pizzas and photograph ourselves doing so! I have never tossed pizza dough and was looking forward to trying. The recipe provided makes 6 pizzas (about 9") so I figured even if some of the dough landed on the floor I would still have enough pizza!
In order to get pictures of myself tossing the dough, I needed to have someone to take the pictures (Erica, as always, you are awesome!). And, like I said, the recipe makes 6 pizzas so I need friends to eat it, too! So... I hosted the first of what will be many pizza nights!
Monica, Erica, and Britteny came over and we all tried our hand at tossing the pizza. It was such a blast, NONE of the dough landed on the floor, and we ended up with 6 really good looking, round pizzas! WE ROCK! :) Try tossing the dough next time you make pizza. It was actually MUCH easier than rolling it out!

 A little worried, but it all worked out!
Britteny rocking the toss!
 Erica making it look like a piece of cake!
 Perfect hand positioning, Monica!
 Basic Pepperoni with Tomato Sauce
 The top ranking pizza of the night: Pesto sauce
 Spinach and Feta with Tomato Sauce
 BBQ Chicken Pizza with Gouda
Pumpkin Cream Cheese "Sauce" with
Sliced Granny Smith Apples, Walnuts, and
Caramel Sauce Drizzle

Nutella and Bananas... SHOCKER!
We enjoyed all of the pizzas and had a blast making them! The recipe for the dough was FANTASTIC! It will be my go-to recipe from now on. The best part is that you can freeze the dough for up to 3 months and you can have fresh pizza whenever your heart desires!
October's challenge was hosted by Rosa of Rosa's Yummy Yums and was in honor of Sher of What Did You Eat? who passed away earlier in the year. Thanks for choosing an awesome challenge! It was a lot of fun! Don't forget to check out the DB Blogroll to see all the delicious pizzas and check out the tossing skills!
BASIC PIZZA DOUGH
Original recipe taken from “The Bread Baker’s Apprentice” by Peter Reinhart Makes 6 pizza crusts (about 9-12 inches)
Ingredients:
4 1/2 Cups Unbleached bread flour or all purpose flour, chilled
1 3/4 Tsp Salt
1 Tsp Instant yeast
1/4 Cup Olive oil or vegetable oil
1 3/4 Cups Water, ice cold (40° F/4.5° C)
1 Tb sugar
cornmeal for dusting
DAY ONE:
1. Mix together the flour, salt and instant yeast in a big bowl (or in the bowl of your stand mixer).
2. Add the oil, sugar and cold water and mix well (with the help of a large wooden spoon or with the paddle attachment, on low speed) in order to form a sticky ball of dough. On a clean surface, knead for about 5-7 minutes, until the dough is smooth and the ingredients are homogeneously distributed. If it is too wet, add a little flour (not too much, though) and if it is too dry add 1 or 2 teaspoons extra water.
NOTE: If you are using an electric mixer, switch to the dough hook and mix on medium speed for the same amount of time.The dough should clear the sides of the bowl but stick to the bottom of the bowl. If the dough is too wet, sprinkle in a little more flour, so that it clears the sides. If, on the contrary, it clears the bottom of the bowl, dribble in a teaspoon or two of cold water.The finished dough should be springy, elastic, and sticky, not just tacky, and register 50°-55° F/10°-13° C.
3. Flour a work surface or counter. Line a jelly pan with baking paper/parchment. Lightly oil the paper.
4. With the help of a metal or plastic dough scraper, cut the dough into 6 equal pieces (or larger if you want to make larger pizzas).
NOTE: To avoid the dough from sticking to the scraper, dip the scraper into water between cuts.
5. Sprinkle some flour over the dough. Make sure your hands are dry and then flour them. Gently round each piece into a ball.
NOTE: If the dough sticks to your hands, then dip your hands into the flour again.
6. Transfer the dough balls to the lined jelly pan and mist them generously with spray oil. Slip the pan into plastic bag or enclose in plastic food wrap.
7. Put the pan into the refrigerator and let the dough rest overnight or for up to thee days.
NOTE: You can store the dough balls in a zippered freezer bag if you want to save some of the dough for any future baking. In that case, pour some oil(a few tablespooons only) in a medium bowl and dip each dough ball into the oil, so that it is completely covered in oil. Then put each ball into a separate bag. Store the bags in the freezer for no longer than 3 months. The day before you plan to make pizza, remember to transfer the dough balls from the freezer to the refrigerator.
DAY TWO
8. On the day you plan to eat pizza, exactly 2 hours before you make it, remove the desired number of dough balls from the refrigerator. Dust the counter with flour and spray lightly with oil. Place the dough balls on a floured surface and sprinkle them with flour. Dust your hands with flour and delicately press the dough into disks about 1/2 inch/1.3 cm thick and 5 inches/12.7 cm in diameter. Sprinkle with flour and mist with oil. Loosely cover the dough rounds with plastic wrap and then allow to rest for 2 hours.
9. At least 45 minutes before making the pizza, place a baking stone on the lower third of the oven. Preheat the oven as hot as possible (500° F/260° C).
NOTE: If you do not have a baking stone, then use the back of a jelly pan. Do not preheat the pan.
10. Generously sprinkle the back of a jelly pan with cornmeal. Flour your hands (palms, backs and knuckles). Take 1 piece of dough by lifting it with a pastry scraper. Lay the dough across your fists in a very delicate way and carefully stretch it by bouncing it in a circular motion on your hands, and by giving it a little stretch with each bounce. Once the dough has expanded outward, move to a full toss.
NOTE: Make only one pizza at a time.During the tossing process, if the dough tends to stick to your hands, lay it down on the floured counter and reflour your hands, then continue the tossing and shaping. In case you would be having trouble tossing the dough or if the dough never wants to expand and always springs back, let it rest for approximately 5-20 minutes in order for the gluten to relax fully,then try again.You can also resort to using a rolling pin, although it isn’t as effective as the toss method.
11. When the dough has the shape you want (about 9-12 inches), place it on the back of the jelly pan, making sure there is enough cornmeal to allow it to slide and not stick to the pan.
12. Lightly top it with sweet or savory toppings of your choice.
13. Place the garnished pizza onto the stone in the oven or bake directly on the jelly pan. Close the door and bake for about 5-8 minutes.
NOTE: Remember that the best pizzas are topped not too generously. No more than 3 or 4 toppings (including sauce and cheese) are sufficient.
14. Slide the garnished pizza onto the stone in the oven or bake directly on the jelly pan. Close the door and bake for abour 5-8 minutes.
NOTE: After 2 minutes baking, take a peek. For an even baking, rotate 180°.If the top gets done before the bottom, you will need to move the stone or jelly pane to a lower shelf before the next round. On the contrary, if the bottom crisps before the cheese caramelizes, then you will need to raise the stone or jelly.
15. Take the pizza out of the oven and transfer it to a cutting board or your plate. In order to allow the cheese to set a little, wait 3-5 minutes before slicing or serving.
Nutella Fruit Dip
Time for snack! WOW! This was such a yummy treat! My 3 year old (and me and well... everyone who tasted it!) loved it! Sure, it won't be an everyday snack but it will be a special once in a while one! The loads of fruit make it healthy, right? :)
Nutella-Cinnamon Dip
Allrecipes
1 (8 ounce) package cream cheese, softened
1 (7 ounce) jar marshmallow creme
1 (12 ounce) container Cool Whip, thawed
1 teaspoon ground cinnamon
1/2 teaspoon vanilla extract
2 1/2 tablespoons Nutella
In a large bowl, beat the cream cheese, marshmallow cream, and Cool Whip with an electric mixer until smooth. Stir in cinnamon, vanilla, and Nutella. Pour dip into a serving dish and cover with plastic wrap. Refrigerate for 1 hour before serving.
Monday, October 27, 2008
TWD: Chocolate-Chocolate Cupcakes

Time for cupcakes! Chocolate-Chocolate Cupcakes to be exact! I was excited for this week's recipe because it was going to fit in with Nutella week PERFECTLY! My original plan was to fill the cupcakes with Nutella cream but time got away from me and that didn't happen.
I put these off until the last minute and ended up making them right before we were heading out to the pumpkin patch. I just didn't have the time or energy to fill the cupcakes and make the ganache for the tops. So, I just melted some Nutella and used that for the tops! What a fantastic idea if I do say so myself! :P
These cupcakes gave the TWDers some trouble this week. A lot of people said that they turned out dry and there was a great, lively discussion on what to do to fix that. I tried using half butter/half oil in order to combat the dryness, but they still weren't as moist as I would've liked.
The cupcakes were okay... not great. They were definately edible but they weren't the best chocolate cupcake I've ever had. No offense, Dorie.... Still good, but not a fave.
Thank you to Clara from I Heart Food For Thought for hosting this week... head over to her blog for the recipe! As always, check out the TWD blogroll to see all the wonderful creations! I'm sure there will be amazing Halloween cupcakes out there today!
*NOTE: I'll have an actual Nutella recipe up later today for those of you who are following Nutella week!*
Sunday, October 26, 2008
Nutella French Toast
Breakfast seriously doesn't get any better than this! Sure, it's over the top decadence, but what's wrong with that? I found this recipe at My Melange and I knew that I had to try it. It was amazing! If you love Nutella, try this! You won't be disappointed! Nutella French Toast
12 slices white bread or brioche
Nutella
5 eggs
2 1/4 cups milk
1 tsp cinnamon
splash of Grand Marnier
zest and juice of 1 orange
1 tbsp honey
1 tsp vanilla
powdered sugar
butter
Make the batter. Whisk together the eggs, milk, cinnamon, Grand Marnier, zest, juice, honey and vanilla in a large bowl. Spread equal amounts of Nutella on 6 slices of bread. Put another slice of bread on top, making a Nutella sandwich.
Heat griddle or pan on medium heat, melt butter in pan
Place each Nutella sandwich, one at a time, in the batter. Soak and turn to coat, but not for too long (you don't want them soggy). Place each sandwich on the pan and cook until golden brown on each side. Cut each sandwich in half, diagonally. Dust with powdered sugar and serve with maple syrup.
Saturday, October 25, 2008
Nutella Fudge
It is day 2 of Nutella week and I thought I would share some pics of my Nutella stash. It's not too bad... I'm sure there are worse offenders!

I recently discovered "Nutella & Go!" and I love them! (I'm eating one as I type!) I don't know if you can find them stateside or not. Have any my stateside people seen it? Kristl, I know you love Nutella... have you seen it?


Nutella Fudge
Recipe from Recipezaar
1 (11 1/2 ounce) bag milk chocolate chips
1/2 (13 ounce) jar nutella
1 (14 ounce) can sweetened condensed milk
1 dash salt
2 teaspoons vanilla
Butter an 8" square pan.
In a 1 quart glass bowl, combine the chocolate chips, Nutella, sweetened condensed milk, and salt in a bowl. Microwave (HIGH) mixture for 3 minutes, taking it out halfway through and stirring well and returning it for the remaining time. Carefully remove hot bowl and stir in vanilla.
Pour mixture into prepared pan. Chill for 2 hours. It sets up almost immediately. After it's been chilled, score and cut fudge into bite size pieces.
Chocolate Chip Apple Nutella Muffins
It's officially Nutella week. Okay, well it's not an official holiday week or anything -just something I wanted to do. Who knows... maybe it will become something bigger!
I am beyond obsessed with Nutella. I always have a jar of it in the house. I don't know if that's a good thing or not! I have a ridiculous amount of Nutella recipes that I want to try so check in all week to see the delicious creations!

Chocolate Chip Apple Nutella Muffins
1 cups all-purpose flour
1/2 cup self raising flour
3/4 cup white sugar
1/2 teaspoon salt
2 teaspoons baking powder
1/3 cup cooking oil
1 egg
1/3 cup milk
1 cup chocolate chips
Nutella (6 tablespoons)
2 apples - peeled, cored and chopped
Preheat the oven to 400 degrees F.
Bake for 20-25 minutes.
Friday, October 24, 2008
My 100th Post
WOW! I can't believe that this is my 100th post! I have been having such a blast with this blog! It started out as a fun little challenge and I never really expected for anyone other than close friends and family to read it. It makes me so happy to know that not only do my friends and family enjoy it but other bloggers enjoy it as well!
I was awarded two blog awards recently and wanted to take this opportunity to say thank you! Priscilla of Priscilla's Baking Adventures gave me the "E for Excellent" award and Honey B of The Life and Loves of Grumpy's Honeybunch gave me the "Kreativ Blogger" award. Thank you both so much! It made my day to see these awards and I am really glad to know that you both enjoy my blog!
I have been debating for a few weeks now about what to post for my hundreth. Nothing seemed good enough. So, I have decided that nothing would be great! So, no recipe today. Just a little thank you to everyone who has read over the last 3 months and I hope you will continue to read! I appreciate and read all the comments that are left.
Now of course I couldn't just do NOTHING for my 100th post. A list called "The Omnivore's 100" has been making the rounds on the food blogs. It is a list of 100 things every omnivore should try in their lifetime. Cakespy did a spin-off; a sweet 100. I have an incredibly large sweet tooth, so I decided that it would be fitting to post the Sweet 100 for my 100th post. The foods in red are ones that I have already tried. The others are now on my to-do list! So... look for some of those to be popping up on the blog sometime in the future! Join in on the fun, too! If you don't want to post it on your blog, leave a comment here and let me know how many you have tried (if you don't know what some are, Cakespy has links to descriptions)! I'm at 37. Not great, but a good starting point!
Without further adieu, here is the list. Oh, and tomorrow kicks off Nutella week - something I have been wanting to do for the past month or so! Join me as I blog about my favorite sweet treat, Nutella!
The Sweet 100
1. Red Velvet Cake
2. Princess Torte
3. Whoopie Pie
4. Apple Pie either topped or baked with sharp cheddar
5. Beignet
6. Baklava
7. Black and white cookie
8. Seven Layer Bar (also known as the Magic Bar or Hello Dolly bars)
9. Fried Fruit pie (sometimes called hand pies)
10. Kringle
11. Just-fried (still hot) doughnut
12. Scone with clotted cream
13. Betty, Grunt, Slump, Buckle or Pandowdy
14. Halvah
15. Macarons
16. Banana pudding with nilla wafers
17. Bubble tea (with tapioca "pearls")
18. Dixie Cup
19. Rice Krispie treats
20. Alfajores
21. Blondies
22. Croquembouche
23. Girl Scout cookies
24. Moon cake
25. Candy Apple
26. Baked Alaska
27. Brooklyn Egg Cream
28. Nanaimo bar
29. Baba au rhum
30. King Cake
31. Sachertorte
32. Pavlova
33. Tres Leches Cake
34. Trifle
35. Shoofly Pie
36. Key Lime Pie (made with real key lime)
37. Panna Cotta
38. New York Cheesecake
39. Napoleon / mille-fueille
40. Russian Tea Cake / Mexican Wedding Cake
41. Anzac biscuits
42. Pizzelle
43. Kolache
44. Buckeyes
45. Malasadas
46. Moon Pie
47. Dutch baby
48. Boston Cream Pie
49. Homemade chocolate chip cookies
50. Pralines
51. Gooey butter cake
52. Rusks
53. Daifuku
54. Green tea cake or cookies
55. Cupcakes from a cupcake shop
56. Crème brûlée
57. Some sort of deep fried fair food (twinkie, candy bar, cupcake)
58. Yellow cake with chocolate frosting
59. Jelly Roll
60. Pop Tarts
61. Charlotte Russe
62. An "upside down" dessert (Pineapple upside down cake or Tarte Tatin)
63. Hummingbird Cake
64. Jell-O from a mold
65. Black forest cake
66. Mock Apple Pie (Ritz Cracker Pie)
67. Kulfi
68. Linzer torte
69. Churro
70. Stollen
71. Angel Food Cake
72. Mincemeat pie
73. Concha
74. Opera Cake
75. Sfogliatelle / Lobster tail
76. Pain au chocolat
77. A piece of Gingerbread House
78. Cassata
79. Cannoli
80. Rainbow cookies
81. Religieuse
82. Petits fours
83. Chocolate Souffle
84. Bienenstich (Bee Sting Cake)
85. Rugelach
86. Hamenstashen
87. Homemade marshmallows
88. Rigo Janci
89. Pie or cake made with candy bar flavors (Snickers pie, Reeses pie, etc)
90. Divinity
91. Coke or Cola cake
92. Gateau Basque
93. S'mores
94. Figgy Pudding
95. Bananas foster or other flaming dessert
96. Joe Froggers
97. Sables
98. Millionaire's Shortbread
99. Animal crackers
100. Basbousa
Thursday, October 23, 2008
Pumpkin Penne (and my two pumpkins!)
Fall is here! Okay, so it has been here for a while now, but that's not the point! :) I love fall in Germany. Being from Phoenix, Arizona means that I never really experienced fall. I have been here in Germany now for 6 years and I am still in awe at the beauty that surrounds me!
My good friend Erica took some pictures of my kiddos the other day and I couldn't NOT share. For those of you reading from my area, Erica is starting a photography business. If you need info, let me know! She is awesome!!!!!
 Eric
Eric My Cutie Pies
2 tablespoons butter
1 onion, chopped
Salt and pepper
One 15-ounce can pure pumpkin puree
1 cup heavy cream
1/2 cup grated parmesan cheese, plus more for topping
1/4 cup chopped flat-leaf parsley
In a large pot of boiling, salted water, cook the pasta until al dente. Drain, reserving 1 cup pasta cooking water.
In the same pot, melt the butter over medium-low heat. Add the onion and season with salt and pepper; cook, stirring, until softened, about 6 minutes. Stir in the pumpkin and heavy cream and bring to a boil. Return the pasta to the pot along with the reserved pasta cooking water and toss. Stir in the parmesan; season with salt and pepper.
Top the pasta with the parsley and more parmesan.
Wednesday, October 22, 2008
Cheese of the Month
 Oh, that's right. I have joined another group. Are you surprised? Probably not because I am crazy and am always looking for more. I actually have a few other groups bookmarked that I want to join but I am waiting for some more time to dedicate to them. Although time remains elusive with two little ones!
Anyway... getting back on track. Cheese of the Month was started by (OH MY GOODNESS... I just realized I don't know her real name. :( OOPS!) Adventures in Gluttony. Every month a cheese is chosen and we can make any dish we want (or any number of dishes) with that cheese. I love cheese and love trying new cheeses so this is definately a group that I wanted to join!
October was Cheddar. I was excited about this choice because not only do I love cheddar but I knew that there would be a lot of options!
I have always been intrigued by apple pie recipes that use cheddar. It seemed very odd to me and, well, a little disgusting. But in the spirit of trying something new I decided to make a Cheddar Apple Pie!
Of course choosing what I wanted to make was just the beginning. There are many cheddar apple pie recipes out there. There are the recipes that just call for a cheddar crust and those that actually mix in cheese with the apples. I opted for the cheddar in with the apples in order to get the full effect. I gotta tell you, seeing the cheese cubes with my lovely apples was a little nerve racking. I thought for sure I was going to have a dessert that would just bomb. But, I threw it in the oven and hoped for the best.
 The pie smelled incredible while baking and I started thinking that maybe, just maybe, this would turn out good.
 Well, whaddya know? It was A-MAZ-ING! These cheddar apple pie people are on to something! I thought it would tasty cheesy but it didn't. Even the bites that had big pieces of cheese still didn't taste cheesy. It just enhanced the pie. It was soooo good! One note... eat the pie warm like the recipe says. It isn't bad cold but it is MUCH better warm.
I told my husband about the pie today on the phone and he is VERY skeptical. I think a cheddar apple pie might be in order when he comes home on R&R.
Check out Adventures in Gluttony at the end of the month for the round up to see what others came up with. Also, join in the fun and vote for next month's cheese!
Recipe from Emeril Lagasse (BAM! HEE HEE!)
2 pie crusts
3 medium Golden Delicious apples (about 1 1/4 pounds), peeled, cored, and sliced 1/4-inch thick
3 medium Granny Smith apples (about 1 1/4 pounds), peeled, cored, and sliced 1/4-inch thick
1/3 cup plus 1 tablespoon sugar
2 tablespoons all-purpose flour
4 teaspoons fresh lemon juice
1/2 teaspoon ground cinnamon
1/4 teaspoon grated nutmeg
Pinch salt
1 cup 1/2-inch cubes medium cheddar cheese (4 1/2 ounces)
Preheat the oven to 375° F.Remove the dough from the refrigerator and divide into two portions. On a lightly floured surface, roll out one-half of the crust to a 12-inch circle and transfer to a 9-inch pie pan, pressing gently to fit. Roll out the second half of the crust to a circle and set aside.
In a large bowl, combine the apples, sugar, flour, lemon juice, cinnamon, nutmeg, and salt and toss to coat the apples. Add the cheese and spoon the apple mixture into the prepared pie pan.
Arrange the second crust over the fruit. Trim the edges to a 3/4-inch overhang, fold under the two crusts, and crimp the edges of the crusts together to seal the dough. With a sharp knife, cut a decorative pattern of slits into the top crust. With a pastry brush, brush the cream over the top crust and sprinkle the remaining 1 tablespoon sugar over the top.
Bake until the crust is golden and the juices begin to bubble, 45 to 55 minutes. Remove from the oven and cool on a wire rack for 1 to 2 hours before serving. Serve warm.
Monday, October 20, 2008
TWD: Pumpkin Muffins

It's no secret that I love muffins, so the TWD pick this week was right up my alley. Kelly of Sounding My Barbaric Gulp picked Pumpkin Muffins and I was excited to try them.
The muffins turned out great. The pumpkin flavor wasn't overwhelming and I loved the mix-ins. I followed the recipe exactly which called for golden raisins and nuts (I used walnuts). The muffins were also topped with sunflower seeds which was interesting and added extra crunch. I will definately make these muffins again! Dorie continues to do it week after week! I know I shouldn't be shocked anymore by this, but it is wonderful to have a cookbook with so many delicious recipes that actually turn out!
Check out the TWD blogroll to see what everyone else did. I'm sure there will be lots of interesting variations as this group is full of amazingly creative bakers! Also, check out Kelly's blog for the recipe!
Sunday, October 19, 2008
Honey Scones & Yogurt with Honey and Walnuts


3 ounces walnut halves (about 3/4 cup)
1 cup good-quality honey, such as clover or wildflower
24 ounces plain low-fat yogurt
While still warm, place walnuts in a small bowl; pour honey on top, and stir to coat evenly. Let cool, about 2 minutes.
Divide yogurt among six dessert bowls, and spoon honey mixture over each. Serve immediately.
Saturday, October 18, 2008
Pineapple Beef Stir-Fry

Mmmmmm... stir-fry! I love stir-fry because it is usually quick, packed with veggies, and good for you! This was so delicious! It took a little longer to make just because the meat had to marinate, but as far as cooking time goes, it was speedy!
Pineapple Beef Stir-Fry
Recipe from Baby Center CFYF (I think....)
1 can (20 ounces) pineapple chunks
1/2 cup minced fresh cilantro
1/4 cup soy sauce
1 TBSP ground ginger
1 pound boneless beef round steak, thinly sliced
1 tsp cornstarch
2 tsp canola oil
1 medium sweet red pepper, thinly sliced
1/2 cup cut fresh green beans
1 TBSP chopped green chilies
2 garlic cloves, minced
2 green onions, sliced
Drain the pineapple, reserving 1 cup pineapple and 3/4 cup juice. Save remaining pineapple for another use.
In a small bowl, combine the cilantro, soy sauce, ginger, and pineapple juice. Remove 3/4 cup of this mixture and refrigerate. Combine beef and remaining marinade in ziploc bag and refrigerate for 30 minutes.
Drain and discard marinade. Combine cornstarch and the 3/4 cup marinade. In a wok, stir-fry beef in oil for 5-6 minutes. Remove beef and set aside. Add red pepper, green beans, chilies, and garlic; stir-fry for 5 minutes.
Stir in marinade/cornstarch mixture. Bring to a boil; cook for 1 minute or until thickened. Add the onions, beef, and reserved pineapple. Heat through. Serve over rice.
Friday, October 17, 2008
Almond Joy Oatmeal

Almond Joy Oatmeal
Recipe adapted from Carrots 'n Cake
1/2 cup milk
1/2 cup water
1 cup old fashioned oats
1/4 cup vanilla yogurt (or plain yogurt with a bit of vanilla extract)
Sliced almonds
Chocolate chips
Coconut
Boil milk and water; add oats and cook until done. Put oatmeal in bowl; top with yogurt, almonds, chocolate chips, and coconut.
Thursday, October 16, 2008
Cookie Carnival: Mini Pumpkin Whoopie Pies

These cookies were amazing! I loved everything about them! The cookie itself was very more like a cake, but who doesn't like cake? I made some mini's, but most were huge monster whoopie pies. I also added some orange icing gel to the filling to brighten it up. It makes for a very Halloween-y looking cookie!
There was one problem with the recipe, though. The filling was way too runny. I added extra powdered sugar to try and thicken it up and it didn't help at all. So, I piped in the filling and refrigerated the cookies. That helped a little and the filling didn't run out completely.
Overall I was 100% satisfied with this recipe. I will be making it again and I look forward to playing around with the filling. So many different ways this can be made. Mmmmm... the wheels are turning!
Mini Pumpkin Whoopie Pies
Makes about 20
FOR THE COOKIES
* 1 3/4 cups all-purpose flour
* 3/4 cup unsweetened cocoa powder (not Dutch-process)
* 1 1/2 teaspoons baking soda
* 1/2 teaspoon coarse salt
* 1 tablespoon unsalted butter, softened
* 1/4 cup vegetable shortening
* 1/2 cup granulated sugar
* 1/2 cup packed dark-brown sugar
* 1 large egg
* 1 cup whole milk
* 1 teaspoon pure vanilla extract
FOR THE FILLING
* 4 ounces cream cheese, at room temperature
* 1/2 cup (1 stick) unsalted butter, at room temperature
* 1/2 cup confectioners' sugar
* 1/4 cup canned solid pack pumpkin
* Pinch of cinnamon
* Pinch of nutmeg
DIRECTIONS
1. Prepare cookies: Preheat oven to 375 degrees. Sift together flour, cocoa powder, baking soda, and salt into a medium bowl; set aside.
2. Place butter, shortening, and sugars into the bowl of an electric mixer fitted with the paddle attachment. Mix on high speed until smooth, about 3 minutes. Add egg; mix until pale and fluffy, about 2 minutes. Mix in half the flour mixture, then the milk and vanilla. Mix in remaining flour mixture.
3. Drop about 2 teaspoons dough onto baking sheets lined with parchment paper, spacing 2 inches apart. Bake until cookies spring back when lightly touched, 12 to 14 minutes. Transfer baking sheets to wire racks and let cool 10 minutes. Remove cookies from baking sheets and transfer to wire racks using a spatula; let cool completely.
4. Prepare filling: In the bowl of a mixer fitted with the paddle attachment, whip together cream cheese, butter and confectioners' sugar on medium speed until smooth, about 3 minutes. Add pumpkin, cinnamon, and nutmeg; whip until smooth, scraping down the bowl as necessary.
5. Pipe or spoon about 2 teaspoons filling on the flat sides of half the cookies. Sandwich with remaining cookies, keeping the flat sides down.
Wednesday, October 15, 2008
Coconut Bread
 I heart coconut very much! I enjoy making quick breads, but usually they are of the banana/zucchini/pumpkin variety. (No... not all three together!) I'm not sure where the recipe came from, though. I found it sitting in my baked goods file in the kitchen. Who knows how long it had been sitting there, but when I found it last week I knew I had to make it! It was delicious and not overly sweet. It didn't last long... maybe about 24 hours! That's a tad embarrassing to admit considering it was only me and a 3 year old eating it! Well... I did cut the recipe in half and I gave 2 pieces away, so I didn't eat ALL of it! :)
Coconut Bread
3 cups AP flour
2 tsp baking powder
1/2 tsp baking soda
1 tsp salt
2 cups sugar
1 cup vegetable oil
4 eggs, lightly beaten
2 tsp coconut extract
1 cup buttermilk
1 cup shredded sweetened coconut
Preheat oven to 325. Grease and flour 2 loaf pans. Combine flour, baking powder, baking soda, and salt in a medium bowl. Mix well. Combine sugar, oil, eggs, and coconut extract in another bowl by hand. Add flour mixture to sugar mixture alternately with the buttermilk stirring just until moist. Stir in coconut. Pour batter into prepared pans. Bake until a toothpick inserted in the center comes out clean, about 1 hour.
Tuesday, October 14, 2008
Potato Leek Chowder & Bread Bowls
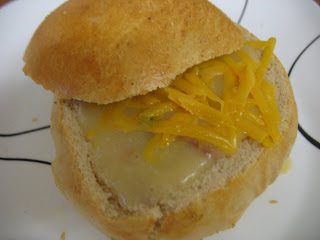

Heat oil in dutch oven or large pot. Add leek and cook until tender. Set aside.
Bread Bowls
2 (.25 ounce) packages active dry yeast
2 1/2 cups warm water (110 degrees F/45 degrees C)
2 teaspoons salt
2 tablespoons vegetable oil
7 cups all-purpose flour
1 tablespoon cornmeal
1 egg white
1 tablespoon water
Add salt, oil and 4 cups flour to the yeast mixture; beat well. Stir in the remaining flour, 1/2 cup at a time, beating well with an electric mixer at medium speed after each addition.


.jpg)


